Behind the Scenes

How We Create Aleph with Beth Videos

We would love to see more people doing what we’re doing. And we know there are people out there with the ability to teach Greek or Hebrew (or perhaps other languages), but maybe they think that they can’t afford the equipment to make quality videos and post them for free. Others may think that it’s too complicated to learn how to film and edit video. So if you’re one of those people, we’re glad you’re here! This page is here to show you that it doesn’t take thousands of dollars and access to “professionals” to do what we’re doing. We want to share everything we’ve learned, all the exact tools we use, and how you can get started on a low budget.

If you’re interested in teaching the biblical languages, we want to encourage you to please make your videos available for free under a creative commons license or public domain, with no paywalls or ulterior motives of building an income funnel. Read our Why Free? page for more information.

Getting into film and the world of YouTube can be intimidating, but it’s not as hard as you think if you know where to start. So let’s talk about the equipment and tools we use for our Aleph with Beth videos, and all the exact costs involved, in both time and money (as of July 2021).

Time & Planning Cost

When you start out, expect to spend a lot of time finding your rhythm. The important thing is to be systematic and consistent. The internet is filled with half-baked projects, great ideas that fizzled out, and the neglected ruins of good intentions. If you commit to doing this, follow through. And be systematic in your teaching. A complex conversation or monologue in a biblical language is cool, but it’s only helpful to those who are already really good at that language. The Body of Christ needs someone to slowly and systematically take them from zero to the stars.  Plan on making hundreds of videos over the course of years or decades. That’s the kind of valuable work the Kingdom needs.  
 
Beth spends around 20-30 hours per video: planning, scripting, filming, gathering the right assets (stock footage, etc), editing, and checking. Plan on doing that or more. Creating compelling content doesn’t happen fast and there are no shortcuts. 
 
One more important thing: don’t do this alone. Get a small group of people with PhDs or expertise in the language, and send the video drafts to them before you publish them. Have them check them over and give you suggestions and make corrections. Trust us, you will make mistakes. And you don’t want to find out about those mistakes after a thousand people have viewed it (been there, done that)! For Aleph with Beth, we count on a handful of volunteers (Hebrew teachers and scholars) besides us to check our videos. And still errors occasionally slip through! You can’t have too many eyes checking for those errors that will be invisible to you after hours of editing.

Cameras

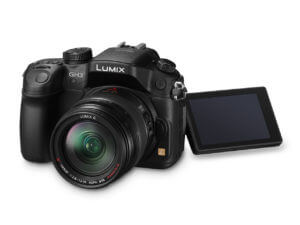
You only really need one good camera to get started. We use the Panasonic Lumix GH3, but will soon be upgrading to the GH5. It shoots amazing Full HD video, and has everything you need to be successful. You can get a used one for around $300 on eBay. If you can afford more, we recommend trying more expensive Canon cameras with dual pixel autofocus, or some of the new offerings from Sony. Even though we love the GH3’s quality, the autofocus technology that it has is nowhere near that of Canon and Sony. That said, with the use of an external monitor on the GH3 we don’t have focus issues anymore because we keep it on manual most of the time, since our teaching shots usually aren’t moving in and out of the focus range. If you’re intimidated by the learning curve of a GH3, fear not: there are an abundance of YouTube videos explaining how to use it, down to the most minute detail.
 
What if you need to do close-up shots of toys and such while teaching? For that it’s helpful to have two cameras. When we started we borrowed a camera from a friend for those multiple-angle shots. But if you can’t afford another camera, and don’t have friends who will lend you one, you can film the closeups separately after recording yourself teaching, and then put it all together in post-production.  Currently, we use a Canon M50 as our second camera, since some generous donors have helped make the purchase of that possible. We like the camera’s autofocus, but if we had the chance to do it over, we’d get something else. The reason is that it doesn’t have a headphone jack to monitor the microphone audio. Update: we got a GH5 but still like the quality of the GH3 better, so we’re still filming Beth teaching at 1080p, but exporting everything as 4K. We use the GH5 for footage of manuscripts in 4K and slow motion when we need it. 

Accessories

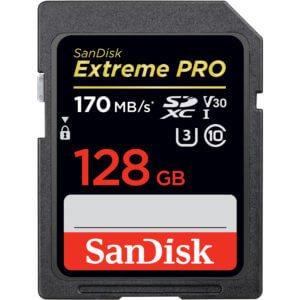
You’ll need a fast SD card for your camera. We recommend and use these, which are around $37. You can get a 64GB one for cheaper if you’re on a budget. That’s what we started with. You’ll also need a tripod. We started out with this $30 one, and it does everything you need. Now we have a Davis & Sanford Provista tripod (about $130 used from eBay) that is more expensive, but gives you the ability to do more professional pans and is more sturdy in general.

Lens

For those who are just learning about the world of film-making, it can be surprising how much good lenses cost. Our advice: bite the bullet and just accept the fact that lenses are going to be expensive, and may even cost more than your camera. The lens we use is the Panasonic LUMIX G Vario 12-60mm f/3.5-5.6. It’s versatile and does everything we need. We got a used one on eBay for $220. But you know what? If you can’t afford that to start with,  just get this lens for only $27.99! That’s what we started with, and it works! And it even has a nice, cinematic feel to it. The bottom line: take the time to learn how to use your equipment well and experiment, and that’s what will ultimately make your videos look professional. Professional equipment that costs thousands of dollars can produce poor results if the user doesn’t take the time to learn how to use it.

Microphone

This is an incredibly vast topic! And there’s a ton of confusing and misleading information out there. We’ve sifted through all the data and conflicting advice so you don’t have to. So make sure to listen closely and disregard the advice of well-meaning “professionals” who might try to convince you to do something different.
 
Since your goal is to teach (and not make Hollywood-level films), you only really need one thing: a good lavalier (lapel) mic. That’s it. There are lots of people who will try to sell you high-end condenser mics with audio interfaces or shotgun mics. Just ignore all of that. We’ve tried that stuff, and it doesn’t work nearly as good as the simple $15 mic we got on Amazon. Since that mic is only available in Mexico, to my knowledge, let’s talk about the important characteristics it has: 1) it’s compatible with DSLR cameras, 2) it has a long, 20-foot cable, 3) it’s rechargeable (you don’t want to be messing with replacing batteries). That’s all you need. You could spend $400+ on a professional lapel mic, but it’s simply not worth it. Ours plugs straight into our camera and just works. Here’s an equivalent one available in the US that would be worth getting.  If you decide to get another brand, make sure to avoid mics that have short cables but come with an extension cable. Extension cables can cause too many problems to be worth it. Stick with one that has one, long uninterrupted cable.
 
But what about recording voice overs in the videos? If you’re on a budget, you can use the same lapel mic to do that too. But we use something even better: this Samson USB dynamic mic. We got ours for about $80. Again, you’ll hear people telling you to get a condenser mic instead, but don’t listen to them! Condenser mics are too sensitive, and end up recording all the sounds in the room and outside your house! Dynamic mics, on the other hand, are extremely optimized for the human voice, and don’t record all the echoes in your room (or the sound of your wife typing downstairs!). Other people will try to convince you to buy a Shure SM7 mic, which you’ll see many podcasters using. But this mic is extremely expensive, more complex to use, and no one will be able to tell the difference between it and the $80 Samson mic we recommend. 

If you take our advice you’ll save yourself a ton of money and headaches, and you’ll sound more professional than all the people who spent hundreds of dollars on condenser mics.
 
Speaking of sound, you’ll need to think carefully about the room where you record. Big echoey concrete rooms are not a good option, but if it’s all you have, you’ll have to plan on investing about $100 on things to dampen the echo. (Some people will tell you that a shotgun mic will solve this problem for you. It’s not true. We bought one of the best $250 shotgun mics and it sounded way worse than our $15 lapel mic.) Used towels and blankets from a garage sale are a great option for acoustic treatment. If you don’t have carpeted floors, you’ll need to get some carpets. If you can rig up a cheap foam mattress or thick blanket as a roof over your head outside of the frame, do it. That’s what we use too. And another word of advice: don’t waste money on “acoustic foam” that Amazon sells. A used towel is many times more effective than that kind of thing.
 
Finally, it’s best to always have a second person running the camera and monitoring your audio. The last thing you want is to end up recording a lesson and then realize the mic was off or the image was out of focus (yeah, been there, done that too).

Lighting

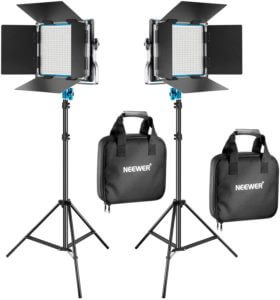
The kind of lighting you have will be the difference between something looking amateur or awesome. Even a $10,000 camera will give you bad results if your lighting is bad. You should expect to spend a minimum of $200 on lighting. We recommend this $169 kit by Neewer. But if you can’t afford that yet, get two of these bulbs, and put them in these clamp reflectors. Then to diffuse the light you can use white, semi transparent plastic bags or pieces of a cheap, white shower curtain taped over the front of the light. We’ve done both, and it works! In the video above you can see just how many lights we are using.
 
We also have a ring light like this one on the table off camera to give Beth’s face a little more glow. You don’t have to have it, but it comes in handy if you can afford another $20.
 
As you can see in our videos, we also use two bright lights behind Beth to light up the white wall behind her. All you really need for that effect is one or two of the bulbs we mentioned above. This creates a nice, clean canvas for razor sharp text and superimposing images and clips.
 
So where do you put the lights? It’s good to remember that you’re teaching, and not making an artistic movie, so that changes how you’ll position the lights. We recommend the big ones facing you to be at about the same height as your head, angling in at you from both sides so that you have a clear, even lighting on your face with no shadows. Experiment until you get it looking awesome.  

Computer

You can get extremely powerful computers these days for $300-400. We recommend getting a desktop PC and a lot of storage space. Buy a 4-8 TB external drive as a backup, and make sure you get a computer with a solid state drive (SSD). If you can, get a computer running an AMD processor, since they are cheaper and faster than Intel now. We currently use a Dell XPS tower that we bought used on eBay. We upgraded it with a GeForce 1060 graphics card (GPU) so that we could run the game Assassin’s Creed Origins that you see in our videos. Here are some specs we recommend:

  • 1TB solid state drive (SSD) or bigger
  • AMD Ryzen 7 or Intel i7 processor or higher
  • 32GB or more of memory
  • (Optional if you plan to record gameplay of something like Assassin’s Creed: an Nvidia RTX 3060 or higher)
Don’t let the lack of a supercomputer keep you from starting! We began with a $400 Asus PC with only 8GB of memory. It’s not the greatest to edit on, but it still works!  It’s definitely possible these days to get a great PC for $500 or less that will edit videos like a champ.
Also, keep in mind that the entire world is going through a chip shortage, which means that a lot of prices have gone up on graphics cards and computers in general. So in 2021 it may not be the best time to get a new computer for an affordable price, but if you carefully look through eBay or follow SlickDeals, you may get something good.
 
If you’re already deeply committed to using a Mac, we recommend their amazing new M1 computers, which are fantastic when paired with Final Cut Pro. If you have the money for the software ($299) and the Mac, it’s an extremely powerful option, and may end up being more affordable during this chip shortage. The base model of MacBook Air should be plenty powerful enough to start with, or a Mac Mini is also incredibly affordable for what you get. 

Monitor

There are lots of different monitors out there. We currently have a $100 21in Samsung 1080p monitor as a second monitor, and a 27in 4K AOC monitor, which cost $249 as our primary editing monitor. Your screen doesn’t matter starting out, but as you grow you may want to invest in a monitor that’s more color accurate as we have (after making 50 videos).

Also, it’s important to have a camera monitor to make sure your colors and focus are good before filming. It also helps when filming yourself. We use this one by FeelWorld which costs around $160. It’s surprising how much these little screens cost, but we promise that it will be worth the investment. We struggled a lot before we got one, and it made our filming much better.

Editing Software

We do not recommend using high-end, expensive software like Adobe Premiere Pro. It’s overkill for simple teaching videos, and the learning curve is steep. We use Cyberlink PowerDirector 365, which offers easy, professional grade video editing for less than $5/month, and includes stock footage, images, music, sounds effects, and lots of creative packs. You can find lots of helpful tutorials on YouTube to help you learn the basics and start creating! That said, if you want to insert Hebrew text into your videos, you may want to use something like Adobe Premiere after all, because PowerDirector does not support right-to-left texts. Beth uses the BibleWorks font to insert text, but she has to type it in backwards :/ So unless you want to do that, you’ll have to look for some other programs or deal with the steep learning curve and cost of something like Premiere. DaVinci Resolve is a great and powerful free option, but it doesn’t have the same teaching elements like speech bubbles and other built-in animations that are important for us, and its text titles interface is frustrating to us. Otherwise, you can browse the best free video editors here and try them out.
 
For image editing, we use an old version of Photoshop, but we don’t necessarily recommend that if you don’t already own and know how to use it.  There are plenty of free options out there like Pixlr or GIMP, which give you the power of Photoshop for free. Or for only $40 you could get Affinity Photo. The main thing you need an image editor for is to make high-quality thumbnails for your videos. Good thumbnails are extremely important. Don’t skimp on them.
 
Finally, a word of warning to Mac users: iMovie does not allow you to adjust the placement of text on your video, which is as bad as giving you a car without a steering wheel. So don’t bother with it. We’ve tried Final Cut Pro as well, and it’ll work, but you’ll have to buy separate plugins to make up for teaching elements (like speech bubbles) that it lacks. If you have $300 and aren’t interested in using a PC, Final Cut Pro may be your best bet.

Stock Footage, Images, and Music

Be prepared to invest a good amount of money in this because it’s so crucial. You need to have lots of awesome and beautiful footage to use in your teaching and keep people’s attention with fresh visuals. We started at first using only royalty free sites like PexelsPiqsels, and Unsplash. Later we began paying for Storyblocks ($349/year for a plan that gives us unlimited stock music, video, and images). If you don’t have the budget for that, you can start like we did with only a video plan, which is significantly cheaper. They also have monthly plans.
 
Our current favorite place to get stock footage, graphics and design elements is Canva, which costs $10/month (Canva has recently offered a free subscription to non-profit teams).

YouTube Fair Use Policy

Fair Use is a U.S. law that allows the reuse of copyright-protected material under certain circumstances without getting permission from the copyright owner (learn more here). YouTube simply would not exist if this was not possible. Essentially, if you’re not charging for your content, it’s for educational purposes, and the borrowed content is clearly part of your own unique creative work, then you can use movie clips and clips from other YouTube videos without a problem. This opens up thousands of options for creativity. How do you download YouTube videos to use in your teaching? With this.

Resolution & Framerate

Plan to film in 1080p (also known as Full HD), which is more manageable for your computer and storage than 4K. After editing the video, we then export it in 4K so that the onscreen text is extra crisp and future-proof. 

We film at 30 frames per second (known as “30p” in tech-speak). Many people online will tell you to film in 24p, which we used to do. But we have been persuaded by this video that 30p is better overall for teaching purposes.

Teleprompter

We occasionally use a teleprompter to make promotional videos that we have scripted. You could also use one for your lessons if you’re not as good as Beth at memorizing everything. We made our own teleprompter at home for less than $10. Here’s a video (among many) on how to make one yourself if you’re on a budget. Otherwise, if you need one, you can get one for around $100-200 on Amazon. Here’s one on the cheaper end. The one we use is the size of an iPad pro. If you choose another setup with the camera closer to you, then you could use your phone as the teleprompter like this. There are lots of free apps that display the teleprompter text in reverse and allow you to control the scrolling. We use this one, but there are probably better options if you used an Android tablet.

Toys & Props

These things will be essential, and unfortunately we don’t have a one-stop shop for them. We’ve found different toys and props at Walmart, Amazon, Hobby Lobby, and other random places. A Bible flannel graph/felt board set has also come in handy. These are the doll families we use. Collecting your teaching props is like a fun scavenger hunt! It shouldn’t be too expensive to get started. Be creative and make some things yourself out of clay or cardboard. Beth made a fabulous, biblical-looking house out of cardboard and paint. Biblical puppets and costumes from Amazon are great too.
 

Where to Start Learning

We’ve learned a lot from a few YouTube channels about digital video and sound. A lot of their stuff isn’t applicable to what you’ll be doing, and is aimed more at filmmakers, but it never hurts to learn more about the trade and know what’s out there and what’s available. You might pick up a handy technique here and there:
 

Content

We’ve learned a lot on the journey, we’re always trying to grow and improve, and we hope that our Aleph with Beth videos can serve as an example of compelling, interesting, beautiful, high-quality content. That said, we want to share some practical tips and things we’ve noticed over the years that don’t work. In other words, here are some traps we plead with you to avoid:
 
1. Don’t hide behind the camera. Videos of just your computer screen and your mouse pointing at still images are BORING. They scream amateur, and tell the viewer that the person was too lazy to create something awesome. Boring, low quality stuff also unintentionally communicates that the biblical languages are not really worthy of our time, effort, and pursuit of excellence in teaching. Get in front of the camera and learn to be comfortable there. You need to use body language and expression to communicate comprehensible input. People want to learn from real human faces who joyfully teach what they love.
(Your video thumbnails should also usually include a face or two: people are drawn to human faces).
2. Don’t make lessons at random.  Random content isn’t helpful for most people. Make sure your lessons have a plan and trajectory and order. Guide people, and make your guidance as clear as possible. Keep everything together in one playlist, and put the lesson number on the thumbnails big and clear.
3. Don’t expect people to subscribe to your channel and encourage you if your videos don’t clearly evidence creativity, innovation, and hard work. The question you should ask yourself is: Would someone be distracted by my videos because they’re so interesting and compelling and rich? Would someone be drawn in to binge-watch my channel even if they weren’t planning on learning a biblical language? If the answer is no, then keep working on the quality and content.
4. Don’t mix a bunch of other languages into your channel. If your goal is language-teaching, then stick to one language per channel. Only the language nerds will want to subscribe to your channel if one day you post a Spanish lesson and the next day it’s a Greek video, followed by a Syriac expo the following week. Most people are focusing on just one language at a time, so they’ll find it helpful if you do too.
5. Don’t be so serious. A healthy sense of humor goes a long way to keep people with you and engaged. Don’t be afraid to be a little silly and let your personality show. Don’t look at the camera like a frightened deer. Don’t read off a script like a nervous robot. Natural learning can only happen with a teacher who looks and feels natural and comfortable.

6. Don’t forget the kids! Along the same lines as number five, this one is important. Kids can learn the biblical languages too. Keep children in mind as you design and develop your lesson videos. Ask yourself, Is this something an eight-year-old would be delighted to watch? Would it make them giggle? 
7. Don’t build your lessons around paradigms. This is the temptation for nerdy grammar-lovers. Resist it! Keep the learning process natural and organic. You might focus on a specific grammar point in a specific lesson, but you’ll have to work extra hard to keep it engaging. Move into storytelling as soon as possible, since that is what everyone finds most compelling.
8. Don’t neglect Stephen Krashen’s teaching on language acquisition. Listen to everything you can by him on YouTube. Internalize his principles and flesh them out in your teaching.
9. Don’t be too predictable. Surprise people, and that will delight them and keep them watching. Endeavor to stay fresh and out of the rut. Try new things and new lesson structures.
10. Don’t go too fast. The temptation for nerdy language lovers is to believe that everyone can keep up with them. Slow. Way. Down. Both in your speaking speed and in your pace for adding new information. People will thank you for it. Keep your weaker brothers and sisters in mind.
11. Don’t assume people learn new words as quickly as you. Use a lot of repetition even if you think it’s overkill. Believe us, people will appreciate it. This is hard for geniuses to do, but it’s essential. Also remember that when you’re planning, filming and editing a lesson, you’re hearing that word or phrase dozens of times until you’re sick of it, but your viewers are encountering it for the first time, and they need generous processing time for it to stick.
12. Don’t use the same images or clips too often or for too long. Variety, variety, variety! Along those same lines, don’t use cheesy, low-quality images! The internet is already flooded with “Christian” artwork that will make your eyes bleed. Keep things classy, beautiful, tasteful.
13. Don’t spend time explaining the grammar in English on camera. There are tons of other resources and YouTube channels out there already that are dedicated to talking about Greek or Hebrew in English. Instead of repeating information that someone could easily look up in a textbook or online, spend your precious time doing what hasn’t been done before. What we DON’T have (and really need) are simple, compelling materials showing the biblical languages in action for people to acquire these beautiful languages from square one! Most of your audience will start zoning out once you start explaining grammatical terms, and explanations in English interrupt the immersive learning experience. Also, if you don’t use English, but only the target language, you’ll make your videos accessible to millions more people worldwide who want to learn the biblical languages but may not understand English!

Lesson Planning

Planning engaging language lessons is more of an art than a science. We don’t have a formula we use over and over, but rather each lesson is crafted as we go, and as new ideas arise! However, there are some principles and tools that we’re constantly keeping in mind that you may find helpful:
 
1. Have a loose big-picture plan
 Write out a list or outline of vocabulary, topics and grammar points that need to be taught in a rough order from basic to complex. This will help you have a clear direction as you work toward the more complex structures you want to teach. You don’t have to flesh out your plans in minute detail at the beginning, and you don’t have to stick to what you write down now! It’s just a general direction, and your plans will probably change by the time you get there. My lesson sequence turned out quite different in reality than how I envisioned it in my first planning spreadsheet, and that’s fine! If you make detailed plans for each lesson far in advance, you’ll probably find that you have to significantly revise them later because your teaching path will change along the way as you encounter practical limitations of time and repetition that you couldn’t foresee.
 
2. Keep track of new vocabulary in each lesson
Keep a document with a running list of what new words and forms are introduced in each lesson. That way you can easily look back and double-check whether or not you’ve already introduced a word and it will remind you of vocab you haven’t reviewed in a long time to incorporate into your next lesson. (If you’re super detailed you can keep track of which old vocab words you’ve reviewed in each lesson too, but personally, I’m not that methodical).
 
3. Smooth path from simple to complex 
We want to take students from zero to competence on the smoothest path possible. Start by teaching the simplest forms: single words. Then gradually begin to combine those words into phrases and eventually sentences. Teach a new word by itself and then look for every possible opportunity to use it again in a slightly more complex way. You don’t want your video to be like a series of flashcards where you stay at the level of isolated vocab words. Nor should you introduce a few words and then suddenly jump up ten levels of complexity and expect people to follow you. They won’t.
An example of a slow progression from simple to complex combinations might be: 
 
Singular nouns
Adjectives
Singular nouns + adjectives
Plural nouns
Plural nouns + adjectives
Numbers
Nouns + numbers
Nouns + numbers + adjectives
 
The point is, always look for ways to up the complexity just one notch at a time. This keeps people intrigued and growing almost without noticing it. To do this, you’ll have to be strategic with your vocab choices early on: choose words that you can combine with lots of other known words in lots of different ways. For example, a concrete word like “basket” will give you far more combination opportunities than an abstract word like “peace.” You can say “big basket, small basket, two baskets, three big baskets, put the apple in the basket, the basket is on the table, the woman is holding a basket, the basket is on her head…” etc. but you can’t say “big peace, small peace… put the apple in the peace…” etc. 
 
4. Mix it up
Vocabulary study through the constant repetition of the same phrase or image is boring (anybody else struggle to be motivated to pick up those flashcards?). Vocabulary study becomes exciting when the students learn a new word and then encounter it over and over again, but each time in a new context. The students see that with this one new word, they’ve unlocked a large body of new phrases and combinations that they can now understand! So teach a new word and then mix it with review material in every way you can think of!
 
Be on the lookout constantly for:
  • new ways to remix old vocab
  • ways to combine new vocab with old vocab
  • ways to combine new vocab with old grammar structures
  • ways to combine old vocab with new grammar structures
Try to include a constant cycle of review vocabulary and structures combined with your new material, infusing your videos with comprehensibility.
 
5. Limit the number of new words per lesson
It may be tempting to pile on the vocab because we want students to grow quickly in their comprehension, but I don’t recommend trying to cram 20 or more new vocab words into one lesson. In my experience 10-12 is a pretty good maximum, and depending on the length of your video, less may be even better. This is especially true when teaching new verbs with many forms that need to be learned. The goal is true internalization of each word, so be patient and give yourself room for lots of repetition of each word in different contexts. You may find that you planned too much for one lesson and you have to cut material, save it for a future lesson, or split it into two lessons. That’s okay, it’s better to go slow than to cram. Remember that your students are hearing these words for the very first time.
 
6. Use stories and motivating content
Humans love stories, so the sooner you can start including simple stories, the more fun your lessons will be, for your students and for you! Also, one of the advantages of teaching a biblical language is that you and your students probably already have shared knowledge of a large body of stories and characters that you can use in your teaching! Just activate their memories of key Bible stories with a few keywords, and your students will already be tuned in to who you’re talking about and what is going on. So take advantage of all the shared Bible stories you have at your disposal! Also because most students are studying a biblical language in order to read the Bible, using lots of Bible material in your class is motivating and will help students feel they’re on the path to their goals.

Patreon & Funding

We use Patreon, but there are plenty of other options if you prefer to be different. Here are some things we’ve learned about getting the funding you need to make your work sustainable.
 
1. Be yourself and be a joyful teacher. People love to give to sincere people who love what they’re doing and look like they love what they’re doing.
2. Be radically generous. Don’t fill your videos with ads; just give them away. Make it as easy for people to use your videos as possible, and they will be inspired by your generosity to support you. Radically generous people end up receiving radical generosity. People will see right away if you just have an ulterior motive to “build a platform” for yourself or sell something, and that will kill any generosity that might have come your way.
3. Be responsive, down to earth, kind, and approachable. People love giving to people who are accessible and generous with their time and attention. If you’re not willing to become that kind of person, this isn’t the job for you.
 

Conclusion

We hope these details have been helpful and informative. We want to be cheerleaders for others who are willing to step out in faith and start something to complement what we’re doing (or surpass it!). Feel free to reach out to us here if you have further questions; we’re happy to help! We hope we’ve also shown how reasonably affordable it can be start something like this: well under $2,000. Even if you don’t have $1,500 to invest right now, if you’re serious and passionate about your vision, you could do a kickstarter or gofundme campaign and raise that amount in no time at all. Be encouraged to take a leap of faith and be part of changing the world in this way!

Let's get out there and create.